Setup
Create the app, enable embed, and prepare widget or partner access.
This page walks you through the minimum Relay setup in the same order most teams actually use it.
1. Create the app
Go to Settings → Apps and create a new app record for the Shopify app you want Relay to support.
At minimum, fill in:
- Name
- Shopify App Store URL
You can also add:
- Shopify Partner App ID
Use one Relay app record per Shopify app.
2. Enable the embed
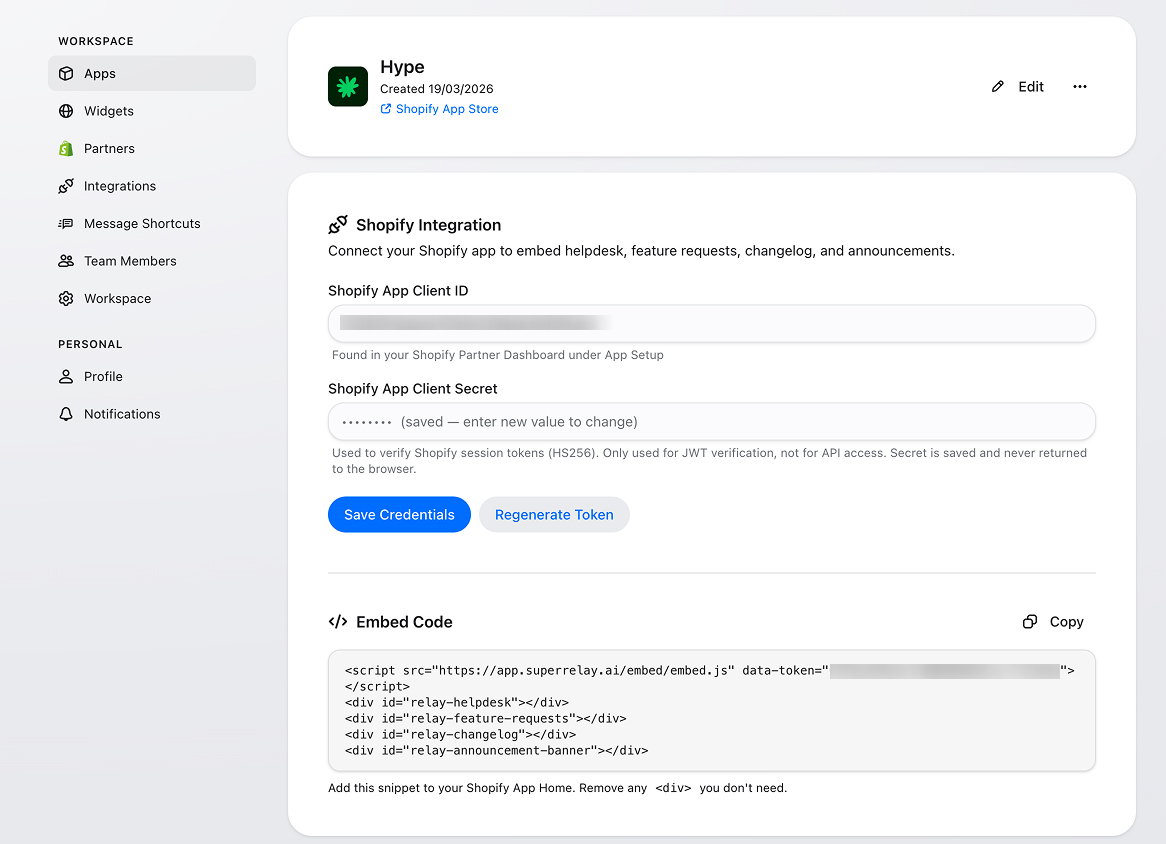
Open the app you just created. In the Shopify Integration section, click
Enable Embed. This generates the Relay embed token and shows the embed
snippet — use that snippet as your source of truth instead of rebuilding it by
hand.
Then, under Relay Secret, click Generate Relay Secret and copy it into
your server as RELAY_SECRET. Your server uses it to sign each shop's identity
so Relay can authenticate helpdesk and feature-request actions — your Shopify
client secret is never shared with Relay. See
Identity Verification for the exact
code (React Router loader, PHP, and a generic HMAC reference).
3. Create a widget if you need one
Go to Settings → Widgets and create a widget if you want the Relay website widget.
The minimum useful fields are:
- Name
- Website URL, if you want the destination site tracked in the UI
Common optional settings:
- Link the widget to the app you created.
- Turn on Knowledge Base.
- Turn on Helpdesk.
Linking the widget to an app is the safest default whenever the widget should use app-specific helpdesk behavior or Shopify-authenticated flows.
4. Connect Shopify Partners if you need collaborator access
Go to Settings → Partners only if you want Relay to request collaborator access through Shopify Partners.
At minimum, provide:
- Partner Organization ID
- the app selection for the partner account
Only add the Shopify Partners session token if you want Relay to request collaborator access on your behalf.
Read Collaborator Access for the exact cookie path.
Setup checklist
- The app is created in Settings → Apps.
- The embed is enabled.
- A Relay Secret is generated and set as
RELAY_SECRETon your server. - The embed token has been generated.
- The widget is created, if you need one.
- The partner account is connected, if you need collaborator access.